
If you have hooded eyes, you already know the frustration. You follow a video tutorial step by step, feel proud of the sharp wing you created with your eye closed, then you open your eyes and the wing disappears. Or worse, it smudges onto the skin above your crease within an hour.
The problem is not your skill. The problem is that most winged eyeliner advice was written for people whose eyelid space stays visible when they look straight ahead. Hooded eyes work differently. The skin folds over the lash line, which means any liner you draw with your eye shut will land in the wrong place once your eye is open . The wing gets swallowed by the fold, and the liner transfers onto the winged eyeliner tutorial for hooded eyes.
This tutorial is built around one rule: you must map and draw your wing with your eye open and relaxed. Every step below follows that rule. By the end, you will have a wing that stays visible, does not smudge, and actually flatters the shape you have.
Before You Draw a Single Line: Prep That Prevents Smudging
Hooded eyes transfer liner more than any other eye shape. The skin of the hood rests directly on top of the lash line, and every blink creates friction. Natural oils from that skin break down even long-wear formulas within hours . Prep is not optional here.
Start with a thin layer of eye primer or a tiny dot of concealer on each lid. Blend it out until it is invisible. Then set that base with a light dusting of translucent powder . This creates a dry, grippy surface. Without this step, your liner will slide and fade no matter how carefully you apply it.
While your base sets, look at your eye shape in the mirror. Notice where your crease falls and how much of your upper lid disappears when you look straight ahead. This tells you where your wing needs to sit. If your outer corner gets covered by the hood, you need to draw the wing slightly higher and more outward than someone without a hood would .
The Right Product Makes the Technique Possible
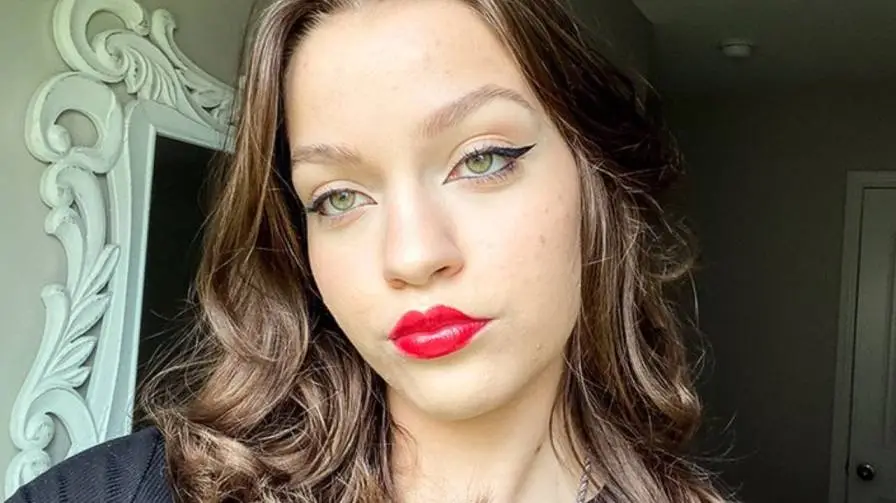
You do not need an expensive liner. You need one that dries down and does not budge. A fine-tip liquid pen gives you the most control for drawing precise lines, especially when you are working around folds . Gel liners in a pot with a small brush also work well because you can tap the product into place rather than dragging it across loose skin .
Avoid creamy pencils for the wing itself. They feel nice going on, but they stay soft and will smear into your crease before lunch. If you prefer a pencil for a softer look, save it for a smudged shadow wing rather than a sharp flick.
One more thing: keep the liner thin. Thick liner eats up the small amount of visible lid space hooded eyes have. A thin, precise line defines the eye without making it look smaller.
Read Also: Soft Glam Makeup Tutorial For Beginners
Step One: Find Your Wing Angle With Your Eye Open
Sit in front of a mirror at eye level. Do not tilt your head back. Do not raise your eyebrows. Relax your face completely and look straight forward .
Now visualize a line extending from the outer corner of your lower lash line up toward the tail of your brow. This is your guide. It follows the natural upward angle of your eye and creates a lifting effect. Place a tiny dot where you want the wing to end. Keep this dot relatively close to your outer corner at first. You can always extend it later. Starting too long is harder to fix.
The critical detail here is that you are placing this dot with your eye open. When you close your eye later, the dot will look too high or slightly off. Ignore that. Your open-eye appearance is what matters. The wing is an optical illusion designed to show up when someone looks at you, not when you look down .
Step Two: Draw the Top Line of the Wing
With the dot in place, draw a thin line from the outer corner of your eye to that dot. Keep the line straight rather than curved. A straight line creates a sharper, more lifted finish, while a curved line can droop and emphasize heaviness .
Draw this line while your eye is still open and relaxed. If the fold gets in the way, gently glide the liner over the top of the fold. Do not pull the skin taut. Stretching changes the shape of your eye, and when you release the skin, the wing will distort . Small, short strokes work better than one long sweep because you have more control around the uneven surface of the hood.
Step Three: Close the Triangle
Now look down slightly. From the tip of your wing, draw a line back toward the middle of your upper lash line. This should connect the wing to your lid and create a small triangle shape . Fill in that triangle with your liner. Do not worry if the fill looks messy at this stage. You will clean it up later.
When you open your eye again, the triangle should fold neatly into your crease. If the wing disappears, your angle was too low. If it looks disconnected from your lash line, you need to bring the bottom line of the triangle closer to your lashes.
The Bat Wing Variation: A Solution for Deep Hoods
If your hood is very prominent and even the open-eye method leaves the wing partially hidden, try the bat wing technique. Instead of curving the bottom line of your wing underneath the hood, draw a straight horizontal line across the resting fold of skin.
Here is how it works. Draw your outer flick as usual, angling upward. Then, instead of connecting the tip back to the lash line with a curved line, draw a straight line directly across the fold. When your eye is closed or looking down, you will see a stepped notch. When you open your eye and look straight ahead, that step folds into your crease and becomes invisible. The wing looks sharp and continuous from the front .
This technique takes a little practice to get the placement right, but it solves the most common hooded-eye problem: a wing that looks perfect closed and broken open.
Step Four: Line the Rest of the Eye Thinly
With the wing done, line the upper lash line from the inner corner to the outer corner. Keep this line as thin as possible and press it right into the roots of your lashes . You are not trying to create a thick dramatic band. You are filling in the gaps between lashes so the lash line looks denser and winged eyeliner tutorial for hooded eyes.
Stop the line where the wing begins. Do not layer extra liner over the inner portion of the wing, or you will create a heavy block that weighs down the eye and defeats the lifting effect.
Step Five: Clean the Edge and Set the Wing
Use a small flat brush with a tiny amount of concealer to sharpen the underside of your wing. Drag the brush along the edge of the flick to clean up any unevenness and make the line crisp . This also helps prevent smudging because you are removing excess product that could migrate into the crease.
If you want extra insurance against transfer, pat a tiny amount of matte black eyeshadow over the wing with a small brush. This sets the liner and adds opacity . Do not skip this if you have oily lids or a very deep hood. It makes a noticeable difference by the end of the day.
What About Tightlining?
Tightlining means applying liner to the upper waterline, the skin between your lashes and your eye. For hooded eyes, this is one of the most useful techniques you can learn because it defines the eye without using up any visible lid space .
Take a waterproof gel pencil and gently lift your upper lashes from underneath. Press the pigment into the waterline right at the roots of the lashes and wiggle it into the gaps between them. This makes your lash line look fuller and darker without drawing a thick line across the lid. It is especially helpful on days when you want definition but do not have time for a full wing.
You May Also Like: Makeup Tutorial for Oily Skin That Lasts All Day
Fixing the Most Common Mistakes
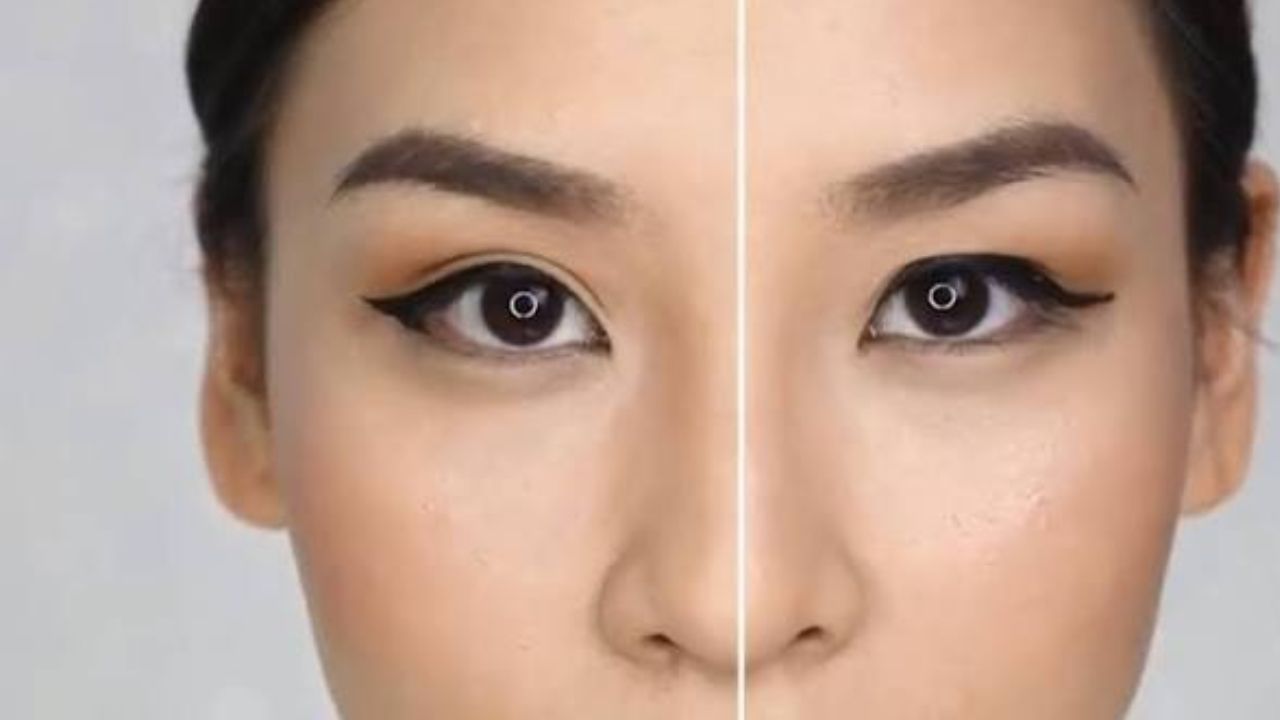
The wing disappears when you open your eye. You drew it with your eye closed or stretched the skin. Redo it with your eye open and relaxed, and angle the wing slightly higher.
The wing smudges onto the hood. You skipped primer or used a creamy formula. Prep with primer and powder, use a liquid or gel liner, and set the wing with matte shadow.
The wing looks crooked compared to the other eye. This is normal. Faces are not perfectly symmetrical. Complete one eye fully, then use it as a reference for the other. Place your dot for the second eye by looking at the first wing in the mirror rather than trying to match angles by feel .
The liner cracks or flakes. The formula is too dry or you applied it over too much powder. Try a different liner and use a lighter hand with the setting powder.
Making the Look Last All Day
Hooded eyes are high-friction zones. Even with good prep and a long-wear liner, you may see some fading by hour eight. Keep a cotton bud and a tiny bit of concealer in your bag for quick touch-ups along the edge of the wing. If you notice transfer onto the hood midway through the day, gently wipe the smudge away with the cotton bud and pat a small amount of powder over the area. Do not try to redraw the wing on the go. It rarely ends well.
At the end of the day, remove your liner gently. Hooded eye skin is delicate, and rubbing at the fold can cause irritation over time. An oil-based cleanser melts the liner without tugging.
A Final Note on Practice
The first three times you try this, the wing will probably not be perfect. That is normal, and it is not a sign that you cannot do it. Hooded eye liner requires you to build a new muscle memory because you are drawing around a fold that most tutorials ignore. Each attempt teaches you where your crease sits and how your particular hood shifts when you open and close your eye.
After a week of practice, the motion becomes automatic. You will stop thinking about the fold and start seeing the wing as it appears to everyone else: sharp, lifted, and visible. That is the goal. Not a wing that looks good in a mirror with your eye shut, but one that works in the real world, on your actual eye shape, all day long.