
You have acne. You want to wear makeup. But you worry makeup will make your acne worse. This is a very common problem for many people in India. Humidity, heat, stress, and hormones can cause acne. And most makeup products feel heavy on the skin.
But here is the good news. You can do makeup even when you have acne. You just need to pick the right products and follow the right steps. This easy makeup tutorial for acne prone skin will help you look good without harming your skin.
I will not use any hard words. I will not give you any fake tips. Every step here is tested on real acne prone skin. Let us start.
What Does Acne Prone Skin Need From Makeup?
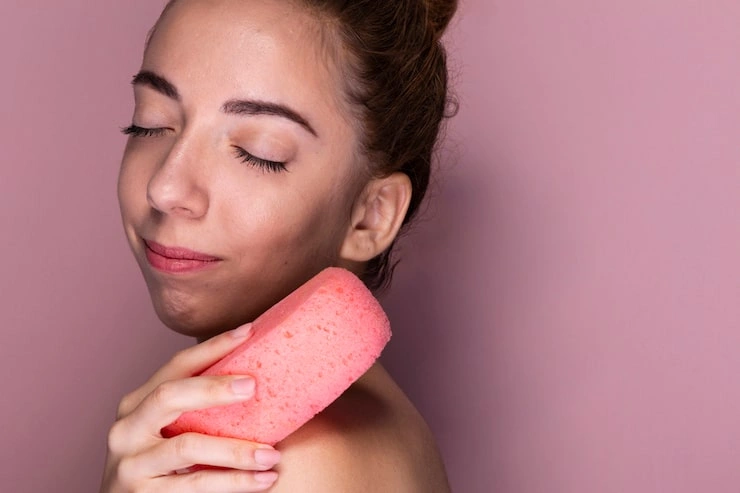
Your skin is already fighting pimples, whiteheads, or redness. So your makeup should not add more trouble. Your makeup must do three things.
First, it should not block your skin pores. Blocked pores mean more acne. Second, it should not have strong smell or alcohol. These things irritate active acne. Third, it should be easy to remove at night. If you rub too much to remove makeup, your acne will get red and angry.
So keep these three rules in mind before you buy any product.
Read Also: How To Contour Your Face At Home For Beginners
Step One – Clean Your Face The Right Way
Do not start makeup on dirty skin. Dirt and oil will mix with your makeup. This mix will sit inside your open pores. The result is new pimples the next morning.
Wash your face with a gentle face wash. Use normal water, not hot water. Hot water takes away natural oil and makes your skin dry. Dry skin produces more oil later. More oil means more acne.
Do not rub your face with a towel. Pat dry softly. If you have open acne sores, use a fresh tissue paper for patting.
Step Two – Apply A Light Moisturizer
Many acne prone people skip moisturizer. They think moisturizer makes skin oily. That is wrong thinking. When you do not apply moisturizer, your skin becomes dry. Dry skin sends a signal to produce more oil. More oil gives you more acne.
Use a gel based moisturizer. Do not use cream based products. Creams are heavy. Gels are light. Look for words like "non comedogenic" on the pack. This word means it does not block pores.
Take a small amount like a grain of rice. Spread it on your cheeks, forehead, chin, and nose. Wait for two minutes. Let your skin drink it fully.
Step Three – Use A Primer Only If Needed
Primer is not for everyone. If you have very oily acne skin, you can skip primer. If you have large open pores, then use a primer on your nose and cheeks near the nose.
Choose a silicone free primer. Silicone based primers feel smooth but they trap oil inside. Trapped oil becomes a new pimple.
Apply primer only on areas where your pores look big. Do not put it all over your face.
Step Four – Pick The Right Foundation For Acne Skin
Foundation is the main part of this easy makeup tutorial for acne prone skin. If you pick wrong foundation, your whole face will break out.
Do not pick full coverage matte foundation. It is very thick. It hides acne but creates new acne under it.
Do not pick dewy or shiny foundation. It makes your face look oily. Oily look means your acne looks more dirty.
Pick a medium coverage foundation with a natural finish. Natural finish means neither too dry nor too shiny. Also pick a water based foundation. Oil based foundations are very bad for acne skin.
Apply foundation with a clean sponge. Do not use your fingers. Your fingers have oil and bacteria. Bacteria will go to your acne and make it worse.
Wet your sponge with water. Squeeze out extra water. Then take little foundation on the back of your hand. Dip the sponge and pat on your face. Do not rub. Rubbing spreads bacteria. Patting keeps everything in place.
Step Five – Hide Acne Marks Without Making It Heavy
You have red marks. Some old acne spots are dark. You want to hide them. But do not use thick concealer on every spot.
Take a small brush. Dip it in concealer. Put concealer only on the red or dark spot. Not on the whole face. Then pat with your finger tip very lightly. Do not spread it. Just tap tap tap until it mixes.
Use a concealer that has the same shade as your foundation. If you use lighter concealer, your spots become grey. If you use darker concealer, your spots become dirty looking.
Step Six – Set With Loose Powder But Do Not Over Do
Setting powder stops your makeup from moving. But too much powder makes your skin look dry and cakey. Cakey makeup settles into acne bumps and makes them look worse.
Take a fluffy brush. Take very little loose powder. Tap off extra powder on your hand. Then roll the brush on your T zone – forehead, nose, chin. Do not press hard. Do not put powder directly on dry acne bumps. Those bumps do not need powder. They need to breathe.
If you have dry acne patches, do not put any powder there. Just leave them as they are.
Step Seven – Eye Makeup For Acne Prone Skin
Acne skin does not mean you cannot do eye makeup. You can. But be careful around your eyes.
Do not use shimmer or glitter eyeshadow. Tiny glitter particles fall on your cheeks. Those particles can enter open pores and cause small bumps.
Use matte eyeshadow in brown, peach, or light pink. These colors look natural and do not harm your skin.
Also do not use kajal or eyeliner on your lower waterline. It blocks the small oil glands near your eyelashes. This gives you stye or small pimples near eyes.
Step Eight – Lip Color
Lip color has nothing to do with acne skin. But many people touch their lips and then touch their face. If you wear a sticky lip color, you will touch your face more often. Touching face transfers bacteria to acne.
So pick a tinted lip balm or a light lip stain. Avoid heavy liquid lipsticks. They are sticky and messy. Also avoid lip gloss. Dust and pollution stick to lip gloss and then you spread it to your chin area.
Step Nine – Do Not Use Highlighter Or Contour
Highlighter and contour are not needed for daily makeup. They are for events and photos. For normal day, they cause more harm than good.
Highlighter has tiny shining particles. These particles go into your open pores. Contour is very dry powder which makes your skin flaky.
If you still want to do it, only do it once a month for a party. Not every day.
Step Ten – Removing Makeup Is More Important Than Applying
This is the most forgotten step. You do beautiful makeup. You go out. You come back tired. You wash your face with just water. And you sleep. This is the biggest mistake. Sleeping with makeup blocks every single pore on your face. Next morning you will see three new pimples at least.
So here is the removal method for acne prone skin.
Take a oil free micellar water. Pour some on a cotton pad. Press the cotton pad on your closed eye for ten seconds. Then wipe slowly. Do the same for lips. Then take a fresh cotton pad and wipe your whole face. After that, wash your face with a gentle face wash. Do it for at least sixty seconds. Then pat dry. Then apply your acne cream if your doctor gave you any. Then apply a light night gel. Do not sleep with bare skin after makeup removal. Your skin needs healing at night.
Extra Tips For Acne Prone Skin Makeup
- Clean your makeup brushes every Sunday. Dirty brushes have old oil and bacteria.
- Do not share your sponge or brush with anyone. Acne can spread through tools.
- Do not do makeup if you have big painful cystic acne. Let it heal first. Only cover small pimples.
- Change your pillow cover every three days. Your face rests on it for eight hours. Dirty pillow cover gives you acne.
- Drink two glasses of warm water in the morning. It helps reduce skin inflammation.
You May Also Like: Everyday Makeup Look Using Minimal Products
What Products To Avoid For Acne Prone Skin?
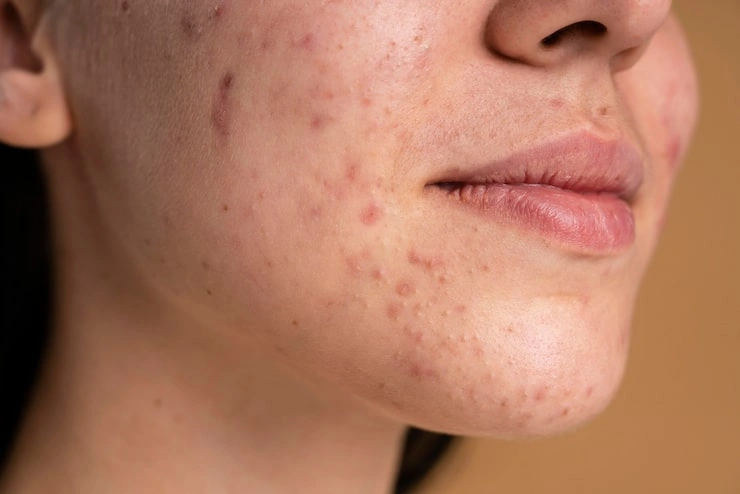
I am giving you a simple list. Avoid these things and your makeup will not harm you.
- Products with alcohol – They dry your skin and cause more oil.
- Coconut oil based products – Coconut oil blocks pores very fast.
- Perfume or fragrance – It irritates red acne and causes burning.
- Thick cream foundation – It sits on top of acne like a layer of plastic.
- Makeup wipes – They do not clean fully. They just move dirt around.
- Spray on setting spray – Most have alcohol. They make your skin tight and painful.
Frequently Asked Questions
Can I wear makeup every day with acne prone skin?
Yes if you follow all the steps I gave you. Clean face, light products, and full removal at night.
Will foundation hide my big pimples completely?
No. Do not try to hide big pimples fully. It will look cakey. Just put a thin layer and let the bump show a little. That looks more natural.
Which is better for acne skin – powder or liquid foundation?
Liquid foundation is better. Powder foundation settles into dry acne patches and looks flaky.
How long should I keep makeup on acne prone skin?
Not more than eight hours. After eight hours, your skin oil mixes with makeup and starts blocking pores.
Can I use home made products like multani mitti after makeup?
No. Never. After makeup removal, use only doctor recommended products. Home made things can react with leftover makeup chemicals.
Conclusion
Doing makeup with acne is not hard. You just need to be kind to your skin. Do not buy heavy products just because a famous person uses them. Buy light, water based, non smelly products. Clean your tools. Remove makeup before sleeping. This easy makeup tutorial for acne prone skin will work for you if you follow each step with patience. Do not jump from step one to step five. Every step matters.
If you have very severe acne with pain and swelling, please visit a skin doctor first. Makeup is not for healing. Makeup is for feeling good. Your health is more important than your looks. Now go and try this method tomorrow morning. You will see the difference in just three days. Your makeup will look natural. Your skin will not get new pimples. And you will feel confident.