
You know that feeling when you see a woman and you just think... wow, she looks good. But you cannot put your finger on why. Her skin is glowing. Her eyes look big and bright. Her lips have this pretty tint. But it does not look like she tried too hard. That is soft glam. I used to think you needed a makeup artist for that look. Or really expensive products. Or maybe just better genes than what I got. Turns out, none of that is true.
Soft glam is actually the easiest makeup style to learn. I am not kidding. Heavy party makeup? Hard. No-makeup makeup? Surprisingly hard because you have to look perfect while looking like you did nothing. Soft glam sits right in the middle. It is forgiving. It works on every face. And you can do it at home with basic stuff.
Let me walk you through this. I will tell you exactly what I do. No fancy terms. No confusing steps. Just real talk about soft glam makeup tutorial at home.
First, what even is soft glam?
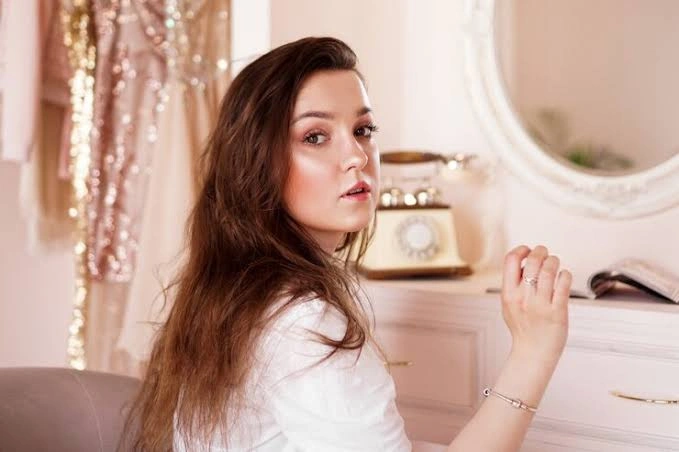
Okay so glam means glamorous. Think red carpet. Think sparkles and drama. But soft takes all that drama and turns it down like ten notches.
Soft glam is what you wear when you want to look polished but still like yourself. Your skin looks smooth but you can still see some freckles or pores. Your eyes have color but it is blended so well you cannot tell where one shade ends and another begins. Your cheeks have this warm flush that looks like you just came in from outside.
I love this style because it works for everyone. Dark skin? Deep browns and golds look incredible. Fair skin? Lighter taupes and rose shades give the perfect glow. Medium skin? Warm bronzes and peaches make you look sun-kissed. The technique does not change. Only the shades shift a little.
And the best part? This style works at any age. I have seen twenty-year-olds look fresh and awake. I have seen sixty-year-olds look lifted and rested. That is the magic of soft glam.
Read Also: How To Blend Eyeshadow Like A Pro For Beginners
Before you even touch a brush
Alright. Let us talk about skin prep.
This is the step everyone wants to skip. I get it. You are excited to put on color. But here is the thing. Makeup sits on your skin. If your skin is dry, your foundation will look like cracked mud. If your skin is oily, your foundation will slide right off by lunchtime. If your skin is not clean, your makeup will look dull and gray. So please. Take ten minutes before you start. Your makeup will look twice as good. I promise.
Wash your face with a gentle cleanser. Use warm water. Not hot. Hot water dries out your skin. Pat your face dry with a soft towel. Do not rub. Rubbing irritates everything. Now put on moisturizer. Pick one that fits your skin. Dry skin needs a thick cream. Oily skin needs a light gel. Combination skin needs something in between. Rub it all over your face and neck. Use upward circles. Wait three minutes. Let it sink in.
Then primer. This stuff is like glue for your makeup. It fills in tiny lines and big pores. Take a pea-sized amount. Rub it between your fingers. Pat it onto your cheeks, forehead, nose, and chin. Spread it outward. Pay extra attention around your nose and between your eyebrows. Those areas get oily fast.
Wait two more minutes. I know. It feels like forever. But if you rush this, your makeup will not last. Patience pays off here.
If you have dark circles under your eyes, now is when you use a color corrector. Peach or orange works for dark circles. Green works for red spots. Just a tiny dot. Pat it with your finger. Do not rub. Rubbing moves it away from where you need it.
Now your skin is ready. It feels smooth. It looks brighter. It actually holds onto makeup now. See? That was not so bad.
Tools you actually need
You do not need a hundred brushes. You do not need that expensive set from Sephora. You need five things. That is it.
A damp beauty sponge. This is my favorite tool. Wet it under water. Squeeze out all the extra water until it feels damp but not dripping. This sponge blends foundation into your skin without leaving streaks. If you prefer a brush, that is fine too. A flat top brush with dense bristles works.
A big fluffy powder brush. This one should be huge and soft. It picks up loose powder and dusts it lightly over your face. A small brush gives you too much powder in one spot. Big brush equals even coverage.
Two eyeshadow brushes. One flat and firm for packing color onto your lid. One fluffy and rounded for blending everything together. That is all you need for eyes. Two brushes.
An angled blush brush. The angle fits your cheekbones perfectly. It picks up the right amount of blush and puts it exactly where it belongs.
A lip brush. This one is optional but helpful. It gives you control. It helps you stay inside your lip lines. And it uses less product so your lipstick lasts longer.
Keep your brushes clean. Dirty brushes have old makeup and bacteria. They also do not blend well. Wash them once a week with mild soap and warm water. Rinse until the water runs clear. Lay them flat on a towel to dry.
Let us actually do the makeup now
Okay. You prepped your skin. You have your tools. Now we go step by step.
Foundation time
Shake your foundation bottle. Pump one drop onto the back of your hand. This warms up the product and makes it easier to spread.
Dip your damp sponge into the foundation. Start from the center of your face. Your nose and the area around your mouth. These areas need the most coverage. Pat the sponge onto your skin.
Do not swipe. I am serious. Swiping moves the foundation around. Patting presses it into your skin. Big difference.
Work outward from your nose toward your ears. Go down toward your chin and up toward your forehead. Keep patting until the foundation looks even.
Here is the thing. You should still see some of your natural skin through the foundation. If you cannot see any skin at all, you used too much. Soft glam means light coverage. Let your real skin show through a little.
Check your jawline. Blend the foundation down your neck slightly. This avoids that embarrassing line where your face ends and your neck begins.
Look at yourself in natural light. Stand near a window. Check for streaks or patches. Pat those areas again until everything looks smooth.
Let the foundation sit for two minutes. It will settle into your skin and look even more natural.
Hiding dark circles and spots
- Dark circles make you look tired. Spots draw attention away from your good features. Concealer fixes both.
- Pick a concealer one shade lighter than your foundation. This brightens your under eyes. Put three small dots under each eye. One dot near your inner corner. One dot in the middle. One dot near your outer corner.
- Now pat them with your ring finger. Your ring finger has the lightest touch. It does not pull your delicate under eye skin. Pat gently until the concealer disappears into your skin.
- For spots, choose a concealer that matches your foundation exactly. Put a tiny dot right on the spot. Pat it with your fingertip. The spot should look less noticeable. Do not pile on more concealer. Too much product draws more attention.
- Let the concealer sit for one minute. This helps it stay in place.
Setting everything with powder
Loose powder keeps your foundation and concealer in place. It stops shine. It stops creasing under your eyes.
Dip your big fluffy brush into the loose powder. Tap the brush handle against your wrist. This removes extra powder. You want a light dusting. Not a white mask.
Sweep the powder over your T-zone. That is your forehead, nose, and chin. These areas get oily first. Sweep a little powder under your eyes too. This sets your concealer. Do not sweep powder all over your cheeks unless you have oily skin. Cheeks look better with a natural glow. Powder takes that glow away.
Look in the mirror. Your face should look matte but not flat. You should still see a gentle sheen on your cheekbones. That sheen comes from your natural skin. Not powder. Your base is done. Your skin looks smooth. Even. Ready for color.
Eyeshadow that makes your eyes pop
This is where the glam happens. But we keep it soft.
Start with a light brown shade. This shade should be close to your skin tone but slightly darker. Take your fluffy eyeshadow brush. Dip it into the shade. Tap off the extra. Sweep this shade into your crease. The crease is that hollow part between your eyebrow and your eyelid. Use windshield wiper motions. Back and forth. Keep going until the color looks soft and diffused.
Now take your flat eyeshadow brush. Pick a medium brown shade. This shade should be richer than the first one. Pat this color onto your eyelid. Start from your lash line and work upward. Stop when you reach the crease. Do not swipe. Pat. Patting gives more pigment. Swiping pushes pigment away.
Take your fluffy brush again. Go back to the crease. Blend the two colors together. Use small circles. The line between the light brown and medium brown should disappear. You want a smooth transition. Now add a shimmer shade. Champagne or gold. Put this shade on the center of your eyelid. Use your ring finger. Pat it gently onto the middle part of your lid. This brightens your eyes. Makes them look wider.
Take the same shimmer shade. Put a tiny dot in your inner corner. Right next to your nose. This opens up your eyes even more. Finally, take a dark brown shade. Use a thin brush. Press this color right along your upper lash line. This acts like eyeliner but softer. Do not wing it out. Keep it close to your lashes.
Take the same dark brown shade. Put a little on your lower lash line. Start from the outer corner. Go halfway toward your inner corner. Blend it with a small brush. Your eyes now look deeper. Brighter. Beautifully framed.
You May Also Like: Makeup Tutorial for Oily Skin That Lasts All Day
Curling lashes and mascara
Curled lashes open your eyes instantly. It is like magic. One little clamp and you look awake.
Use an eyelash curler. Open it. Place it at the base of your upper lashes. Close it gently. Hold for five seconds. Release. Move the curler to the middle of your lashes. Close and hold for five seconds. Release. This gives a natural curl. Not an L-shape.
Now take your mascara. For soft glam, I like brown mascara better than black. Brown looks softer. It blends with neutral eyeshadows better. Wipe the mascara wand on a tissue. This removes extra product. Extra product causes clumps.
Look down into a mirror. Place the wand at the base of your upper lashes. Wiggle it side to side. Sweep it upward. Wiggle and sweep at the same time. This coats every lash. Apply two coats. Wait ten seconds between coats. This lets each coat dry slightly.
For your lower lashes, hold the wand straight up and down. Gently touch it to your lower lashes. Do not wiggle too much. Lower lashes clump easily. Your lashes now look full. Long. Lifted. Such a small step makes such a huge difference.
Bronzer for warmth
- Bronzer gives your face a sun-kissed look. It adds dimension. It brings life back to your skin after foundation.
- Choose a bronzer two shades darker than your skin. Use a matte bronzer. Not shiny. Shiny bronzer looks like glitter on your face.
- Take an angled brush. Dip it into the bronzer. Tap off the extra.
- Smile at yourself. Find the hollows of your cheeks. Sweep the bronzer right into those hollows. Start from your ear and move toward your mouth. Stop when you reach the middle of your cheek.
- Now sweep bronzer along your hairline. Start at your temples. Move across your forehead. Stop at the other temple.
- Sweep a little bronzer under your jawline. This defines your neck and face separation.
- Finally, sweep a tiny bit on each side of your nose. This makes your nose look slimmer.
- Blend everything with a clean brush. No harsh lines. Everything should look soft and natural.
Blush for that healthy flush
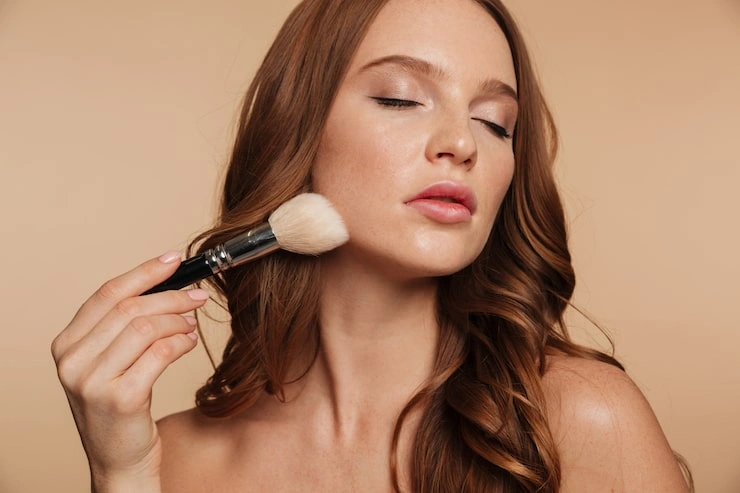
Blush makes you look alive. It gives your cheeks a natural flush.
Pick a blush color that matches your natural blush. Here is a trick. Pinch your cheeks lightly. That color? That is your blush color. Peach for warm skin tones. Pink for cool skin tones. Rose for neutral skin tones. Take your blush brush. Dip it lightly into the blush. Tap off the extra.
Smile again. The round parts of your cheeks pop up. Put the blush right on those round parts. Sweep it upward toward your ears. This lifts your face. Do not put blush too close to your nose. That makes your face look red and flushed in a bad way. Keep blush on the outer parts of your cheeks. Look at your face. The blush should look like you just came in from a walk outside. Natural. Healthy.
Highlighter for that glow
- Highlighter gives your face a soft gleam. It catches light. It makes your features pop.
- Choose a highlighter close to your skin tone. Gold for warm skin. Pearl for cool skin. Champagne for neutral skin.
- Take a small brush or your finger. Dip it into the highlighter.
- Put it on the highest points of your face. Top of your cheekbones. Bridge of your nose. Cupid's bow above your upper lip. Inner corners of your eyes. Center of your forehead.
- Tap the highlighter onto these spots. Do not sweep. Tapping keeps the product exactly where you want it.
- Look at your face from different angles. You should see a gentle gleam. Not a white stripe.
Read: Step-by-Step Natural Makeup Tutorial for Beginners
Perfecting your lips
- Lips finish everything. They bring your whole look together.
- Start with lip balm. Apply it to your lips. Let it sit for two minutes. This hydrates your lips.
- Choose a lip liner that matches your natural lip color. Outline your lips. Follow your natural lip line. Do not overdraw. Soft glam looks natural. Not dramatic.
- Choose your lipstick. For soft glam, go with a nude or rose shade. These colors look natural and elegant.
- Apply the lipstick with your lip brush. Start from the center of your lips. Work outward. Stay inside your lip liner.
- Blot your lips with a tissue. This removes extra product. It also sets the color.
- If you want a glossier look, add a clear gloss on top. Put it only on the center of your lips. This gives a plump effect.
- Your lips now look full. Smooth. Beautifully colored.
Setting spray to lock everything
Setting spray keeps your makeup in place all day. It locks everything together. Hold the setting spray bottle about eight inches from your face. Close your eyes. Spray in an X motion across your face. Then spray in a T motion down your nose and across your forehead. Let the spray dry naturally. Do not touch your face. Do not fan it. Just let it air dry. Your makeup is now set. It will last through work. Through lunch. Through soft glam makeup tutorial at home.
Mistakes I see everywhere
I have been doing makeup for years. I see the same mistakes over and over. Let me save you from them.
Using too much product. This is the biggest one. Soft glam means light layers. Heavy product looks cakey. It settles into lines. It makes you look older. Use small amounts. Build slowly. You can always add more. You cannot take away. Not blending enough. Unblended eyeshadow looks harsh. Unblended foundation looks streaky. Take time to blend. Use clean brushes. Use gentle motions. Blending is the secret.
Wrong color choices. Dark colors do not belong in soft glam. Stay in neutral families. Save dark colors for night parties. Skipping skin preparation. Dry skin ruins makeup. Oily skin ruins makeup. Take five minutes to prepare your skin. Your makeup will look better and last longer. Forgetting your neck. Your face and neck should match. Blend foundation down your neck. Powder your neck lightly. Everything should be seamless. Using too much powder. Powder is not your enemy. But too much makes your face look flat and dry. Use a light hand. Focus only on oily areas.
Making it last all day
- Want your makeup to stay put without touch-ups? Here is what works.
- Start with a good primer. Primer grips your foundation. Stops slipping.
- Use setting powder only in oily areas. Too much powder cracks throughout the day.
- Use setting spray. This is the final lock.
- Carry blotting papers in your bag. When you get oily, press the paper on your T-zone. Do not add more powder. Blotting removes oil without adding product.
- Carry your lipstick for touch-ups. Lips fade after eating. A quick reapply brings back the fresh look.
- Avoid touching your face. Hands transfer oil and dirt. They also rub off your makeup.
FAQs
Can I do soft glam with drugstore makeup?
Yes. Absolutely. Drugstore makeup works very well. Many affordable brands make high quality products. The technique matters more than the price. Practice your blending. That gives better results than expensive products.
How long does soft glam makeup take?
About twenty to thirty minutes. With practice, you can do it in fifteen. The steps are simple. Speed comes with repetition.
What if I have oily skin?
Oily skin needs extra care. Use an oil-free primer. Use a matte foundation. Set your T-zone with extra powder. Use blotting papers during the day. Avoid cream products on oily areas.
What if I have dry skin?
Dry skin needs hydration. Use a rich moisturizer. Use a hydrating primer. Choose a dewy foundation. Avoid powder on your cheeks. Use cream blush and cream highlighter. These add moisture and glow.
Can I skip eyeshadow?
You can. But eyeshadow adds depth. It makes your eyes look bigger. A simple wash of light brown across your lid takes one minute. It makes a big difference.
What lip color works for soft glam?
Nude. Rose. Peach. Soft pink. Choose a shade close to your natural lip color. Dark reds and bright pinks belong to other styles. Soft glam keeps lips natural.
Do I need fake lashes?
No. Fake lashes look dramatic. Soft glam uses your natural lashes. Mascara gives enough volume and length. Save fake lashes for special occasions.
How do I clean my brushes?
Wash brushes with mild soap and warm water. Rinse until the water runs clear. Squeeze out extra water. Lay them flat on a towel. Let them dry overnight. Clean brushes blend better and keep your skin healthy.
Final thoughts
Soft glam makeup is for everyone. It does not ask for perfect skin. It does not ask for expensive products. It asks for patience and practice.
Each time you do it, you get better. Each time, it takes less time.
Start with the basics. Prepare your skin. Apply thin layers. Blend everything well. Keep colors neutral. Add a little shimmer. Finish with a setting spray. That is all you need.
Your face is beautiful without makeup. Soft glam simply highlights that beauty. It brings out your best features. It hides small imperfections. It gives you confidence.
You can do this at home. Your bathroom mirror works. Your natural light works. Your fingers work as brushes. No professional training required. No expensive studio needed.
Take a deep breath. Look at yourself. You are about to create something beautiful. Your soft glam journey starts today.