
Do you put eyeshadow on your lids and then when you open your eyes, it just vanishes? Does your eyeliner always smudge onto your brow bone? If you have hooded eyes, this happens all the time. But the problem is not your makeup. The problem is that you are applying makeup the same way people with regular eyes do. And that does not work for hooded eyes.
Hooded eyes have extra skin that folds down from the brow bone. This skin covers the natural crease of your eye. When you open your eyes, most of your eyelid disappears under this fold. So any eyeshadow you put on your lid gets hidden. Any eyeliner you draw on your lash line gets swallowed up.
But here is the good news. You can learn a few simple tricks to make your makeup show up and look beautiful. This guide is made for beginners. We will use easy words and clear steps. No fancy makeup terms. No complicated techniques. Just simple advice that works on Indian skin tones and makeup tutorial for hooded eyes beginners.
Understanding Your Hooded Eyes
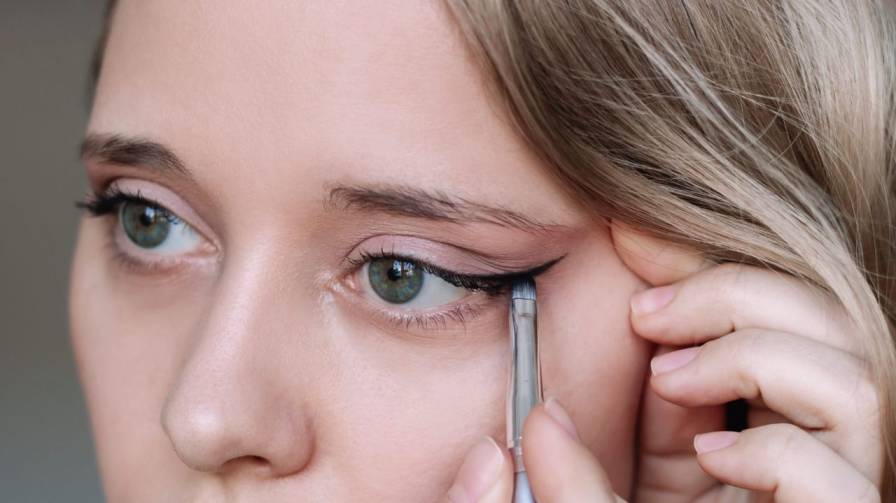
Before you pick up a brush, you need to understand what you are working with. Look straight into a mirror. Keep your face relaxed. Do not raise your eyebrows. Now look at your eyes. Can you see your eyelid clearly? Or is it mostly covered by the skin from your brow bone?
If you cannot see much of your eyelid when your eyes are open, you have hooded eyes. This is very common among Indian women. Many of us have this eye shape. The crease of your eye folds over itself when you open your eyes. This is called a hood.
The skin above your lid might also have some pigmentation. That is normal. Indian skin tones often have more color on the eye area. This can make eyeshadow look muddy if you use the wrong products. Cream-based shadows work better for this. Shimmer shadows can also look greasy and not glowing when they get caught in the fold.
Here is the main thing you need to remember. Do not place your makeup where your eye looks when it is closed. Place your makeup where your eye reads when it is open. This one change will fix most of your problems.
Read Also: Natural Makeup Tutorial For Beginners At Home
What Makes Hooded Eyes Different?
The standard makeup rules were made for eyes where the crease is visible when open. On these eyes, you put light shadow on the lid, medium shadow in the crease, and dark shadow on the outer corner. This creates depth and shape.
But on hooded eyes, this whole map does not work. The lid color gets hidden. The crease color disappears into the fold. So what do you do? You flip the placement. The color goes above where the crease folds. You put it on the visible brow bone area. Then you blend it upward.
This is the same trick that monolid makeup artists use. Monolid eyes have no visible crease at all. Korean makeup artists developed many techniques to make color show up on monolid eyes. These techniques work perfectly for hooded eyes too.
Tools and Products You Need
You do not need expensive products to start. Indian drugstore brands work very well. Colorbar and Swiss Beauty both carry matte eyeshadow singles that are highly pigmented. You can find them easily and they are budget-friendly.
For brushes, you need just a few basics. One flat brush for packing on color. One fluffy brush for blending. A small angled brush for liner. That is enough to begin with.
For eyeliner, use a waterproof gel liner. Felt-tip pens can skip on the skin above your crease. A gel liner in dark brown is better than black. Black can look too harsh on warm Indian skin tones. Dark brown gives definition without looking heavy.
Step-by-Step Makeup Tutorial for Hooded Eyes
Step 1: Start with a Good Base
Take an eye primer and put it all over your lids. This is very important for hooded eyes. The skin on your lids touches your brow bone when your eyes are open. This rubbing can make eyeshadow crease and smudge. A primer stops this from happening.
If you do not have primer, use a concealer. But make sure to set it with powder first. Otherwise the concealer will crease and make everything look messy.
Step 2: Find Your New Crease
This is the most important step. Look straight into the mirror. Relax your face completely. Do not lift your eyebrows. Now feel where the skin of your hood folds down. Just above that fold is where your new crease goes.
Take a matte transition shade. This should be a medium brown or taupe color. Not too dark and not too light. Place this shade from your lash line up to about one centimeter above your crease. Yes, it will look very high when your eye is closed. But when you open your eye, it will be at the right spot.
Blend this shade using a windshield wiper motion. Move the brush back and forth gently. Make sure there are no harsh lines.
Step 3: Add Depth on the Outer Corner
Take a deeper shade. A dark brown or dark plum works well. Concentrate this color at the outer upper corner of your eye. Place it slightly higher than where you think it should go. Blend it well but keep the color stronger at the outer edge.
This creates the illusion of depth. It gives your eye shape and dimension. When you look straight ahead, this color will be visible. That is what you want.
Step 4: Skip the Shimmer on the Lid
Do not put shimmer shadow on the center of your lid. When your eyes are open, the shimmer will get caught in the fold. It will look like grease and not glow. Shimmer can also emphasize the hood instead of making it look good.
Use matte shadows for the main part of your eye. Save the shimmer for just two places. Put a small dot of highlight on your inner corner. Put another small dot directly under your brow bone. That is enough to open your eye without looking messy.
Step 5: Eyeliner That Actually Shows
Do not draw eyeliner on your lash line. It will disappear as soon as you open your eyes. Instead, do the floating liner trick.
Look straight into the mirror. Keep your eyes open. Now mark where the hood ends. This line is above your crease. Draw a thin line along this area. Keep your eyes open while you draw. This is called floating liner. It sits above your crease and stays visible when your eyes are open.
Use a thin, precise stroke. A waterproof gel liner works best. A dark brown shade is softer than black. It defines your eyes without making them look heavy.
Step 6: Tightlining for Fuller Lashes
Kajal on your waterline is an old Indian habit. But on hooded eyes, kajal makes the eye look smaller. It closes off the visible white part of your eye. This adds heaviness and makes the eye seem smaller.
Instead of kajal, try tightlining. This means putting liner on your upper waterline. This is the space between your lashes. Press a dark brown kohl pencil into this area. It adds density to your lash line without drawing a visible stripe. The hood will not swallow it because it is between the lashes.
If you want to put something on your lower waterline, use a nude or white pencil. Put it only on the inner corner. This keeps the eye looking open. A full black lower waterline pushes the eye back into the socket and makes it look smaller.
The Cut Crease Adaptation for Hooded Eyes
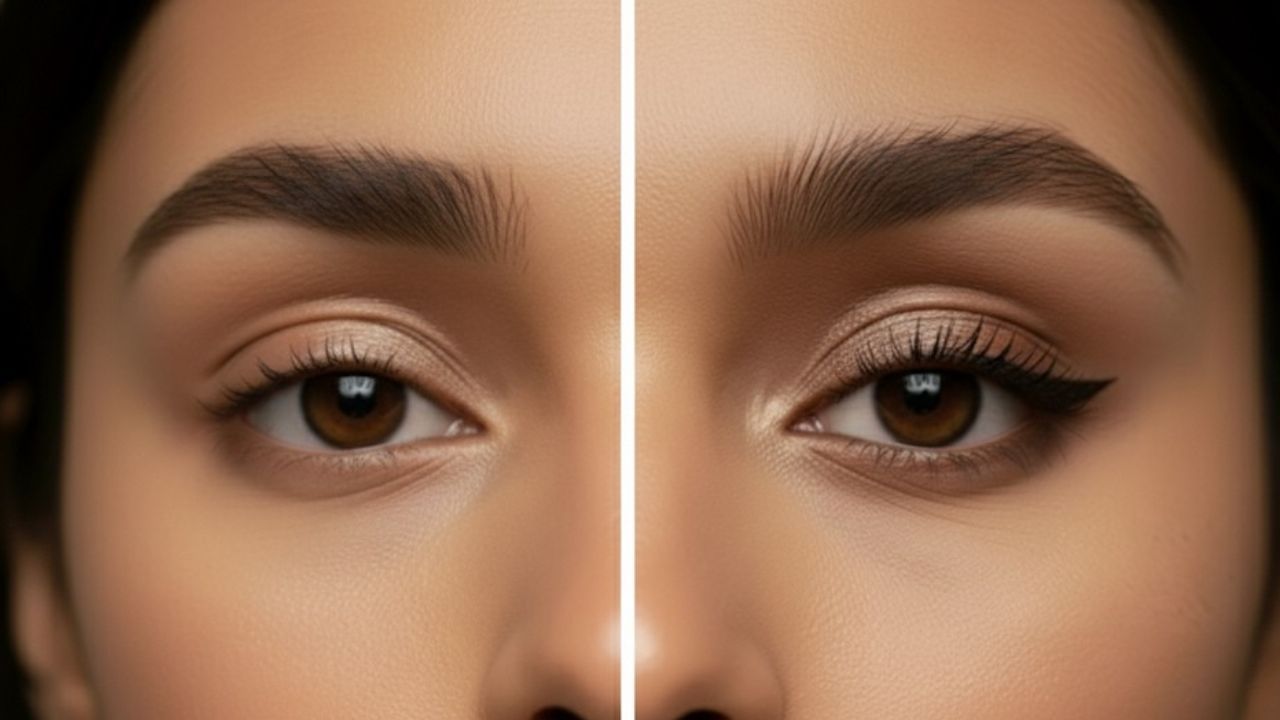
The cut crease is popular in makeup. It means drawing a sharp line of concealer above your crease. This creates the illusion of a deeper socket. On hooded eyes, this technique needs one adjustment. The line sits higher than you think is reasonable.
Here is how you do it. Take a flat eyeshadow brush and a matte concealer. Choose a shade one or two shades lighter than your skin tone. Press it in a curved line across your lid. Start from the inner corner and curve it upward toward your outer brow.
Make sure the concealer is warm-toned. If it is pink-based, it will look grey against warm or olive Indian skin. Brands like Faces Canada and Insight Cosmetics have shades that match Indian undertones well.
Blend the upper edge of this line softly. Keep the lower edge clean and sharp. Then pack a medium-depth matte shadow below this line. Put it right down to your lashes. The contrast between the light concealer and the dark shadow creates a socket where the hood has flattened one out.
Common Mistakes Beginners Make
Mistake 1: Raising Eyebrows While Applying
Many people raise their eyebrows when putting on makeup. This stretches the skin and makes the hood look smaller. Then when you relax your face, the makeup is in the wrong place. Always apply makeup with your face relaxed.
Mistake 2: Using Shimmer Shadows
Shimmer is tempting and it looks pretty in the palette. But on hooded eyes, it gets caught in the fold. It looks oily and messy. Stick to matte shadows. Save shimmer for the inner corner and under the brow.
Mistake 3: Thick Eyeliner
Thick eyeliner takes up all your visible lid space. It makes your eye look heavy and small. Keep your liner thin. This is called a tight line. It gives definition without eating up your makeup tutorial for hooded eyes beginners.
Mistake 4: Following Online Tutorials for Regular Eyes
Most makeup tutorials on YouTube are made for people with regular eyes. They show you how to put shadow on the lid and draw a wing. These techniques do not work for hooded eyes. You need to follow tutorials made specifically for hooded eyes.
You May Also Like: Eye Makeup Tips to Make Your Eyes Look Bigger
Products That Work for Indian Skin and Weather
The Indian climate is hot and humid. This makes makeup melt. For hooded eyes, melting makeup is a bigger problem because the skin rubs together. Use waterproof and long-wear products.
For eyeshadow, choose matte shadows with high pigment payoff. Cream-based shadows also work well. They do not settle into fine lines. For eyeliner, use a waterproof gel liner. It will not smudge in the heat. For kajal, use a smudge-proof pencil on your upper waterline only.
You do not need to buy imported palettes. Indian drugstore brands work very well.
Quick Troubleshooting for Hooded Eye Makeup
Problem: My eyeshadow creases within two hours
Solution: Use an eye primer. Do not skip this step. If you use concealer instead, set it with powder before applying shadow.
Problem: My eyeliner smudges on my brow bone
Solution: Do not put liner on your lash line. Use floating liner above your crease instead. Also set your eye area with powder before applying liner.
Problem: My eye makeup looks muddy
Solution: Use matte shadows with high pigment. Shimmer and low-pigment shadows can look muddy on pigmented lids. Also choose the right undertone. Warm-toned shadows work better on Indian skin.
Problem: I cannot see my eyeshadow at all
Solution: Place your shadow above your crease. Put it on the visible brow bone area. This is where it will show when your eyes are open.
Conclusion
Makeup for hooded eyes is different. But once you learn the right techniques, it becomes easy. The key is to place your makeup where it shows when your eyes are open. Not where it looks good when your eyes are closed.
Do not copy what other people do. Their eyes are different. Learn the techniques that work for your eye shape. Use matte shadows and waterproof liners. Keep your face relaxed when applying makeup. These small changes will make a big difference.